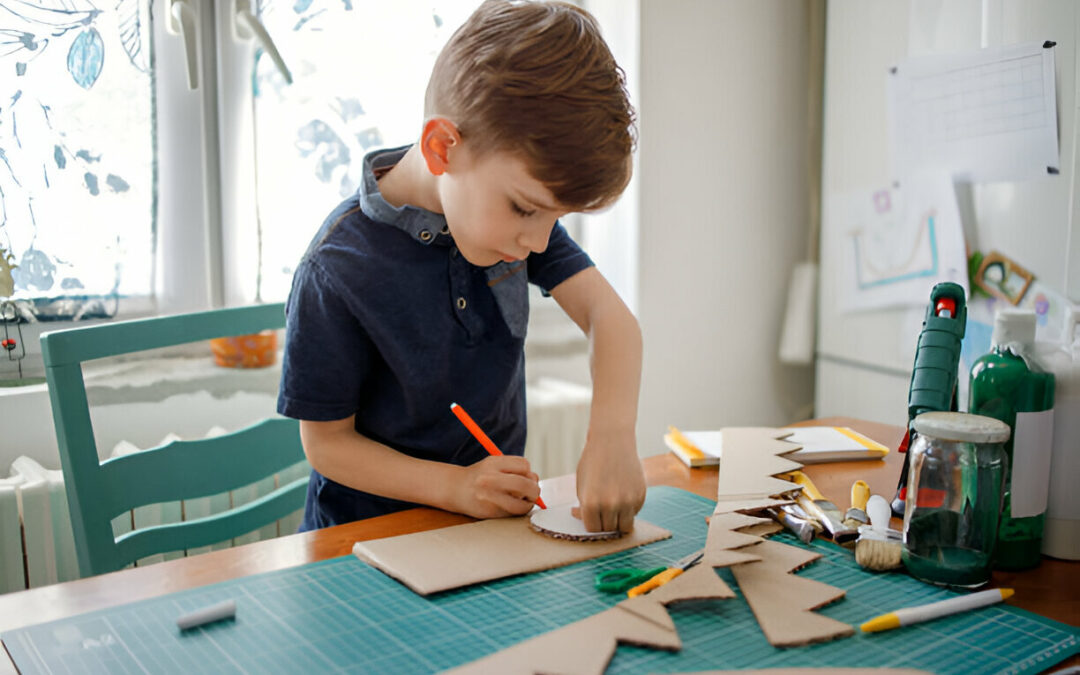
Engaging children in creative activities is vital for their development, and DIY projects for kids are an excellent way to cultivate these skills. Participating in easy DIY projects allows children to express themselves, improve hand-eye coordination, and develop problem-solving abilities. These hands-on activities can also enhance fine motor skills and encourage the use of imagination and creativity.
Benefits of DIY projects for kids include:
● Fostering Creativity: Children’s art and craft ideas often lead to unique outcomes that reflect their personality and thoughts.
● Enhancing Cognitive Skills: Through planning and executing a project, kids learn to follow instructions and make decisions.
● Building Confidence: Completing a project provides a sense of accomplishment that boosts self-esteem.
● Improving Focus: DIY projects require concentration, which can help increase attention spans over time.
● Encouraging Bonding: Working on a project with parents or peers promotes teamwork and communication.
If you’re looking for ways to incorporate educational elements into these crafts, consider exploring immersion opportunities in languages such as Mandarin and Spanish for toddlers. Integrating language learning with art can provide a multifaceted educational experience for your child. To learn more about immersive learning experiences, visit Mandarin and Spanish Immersion where you can find information about Mandarin and Spanish immersion programs specifically designed for toddlers.
By introducing kids to different materials, techniques, and ideas through DIY crafting, you offer them a fun experience and lay the foundation for valuable life skills. Let’s delve into the world of easy DIY projects for kids with some exciting crafts that are sure to be a hit!
1. Tissue Box Monsters
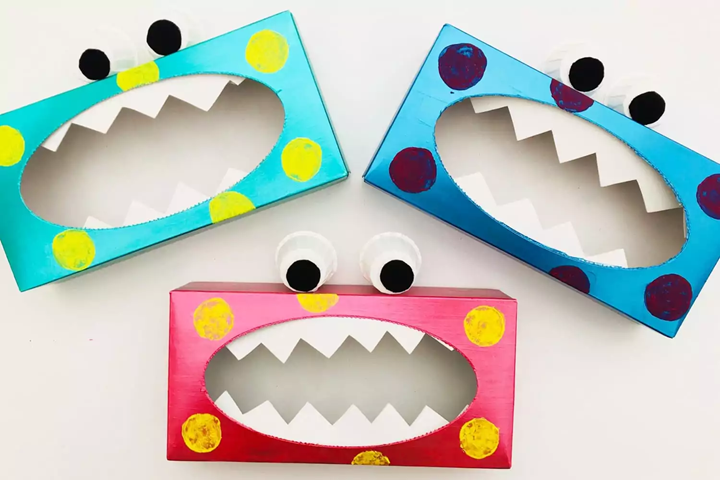
Let’s dive into our first DIY project for kids – Tissue Box Monsters. These friendly monsters are a great way to recycle empty tissue boxes and transform them into fun, interactive toys.
Required Supplies and Materials
To start, gather these craft supplies for your kids:
● Empty tissue box
● Construction paper
● Glue
● Googly eyes
● Paints (optional)
Step-by-step Instructions
1. Begin by painting the tissue box if you want a colorful monster. Allow it to dry completely.
2. Cut out teeth and other monster features from the construction paper.
3. Glue the teeth inside the tissue box opening, making sure they’re visible when the box is closed.
4. Add googly eyes and any other facial features you’d like on your monster.
Customization and Variations
Every monster can be unique! Encourage kids to customize their own tissue box monsters with different colors, facial expressions, or additional details like hair made from yarn or ears cut out from paper.
For an educational twist, you can even incorporate this fun DIY project into language immersion programs offered by Beibei Amigos. Kids can name their monsters in a different language or make multiple monsters that ‘speak’ different languages!
2. Paper Plate Reindeer
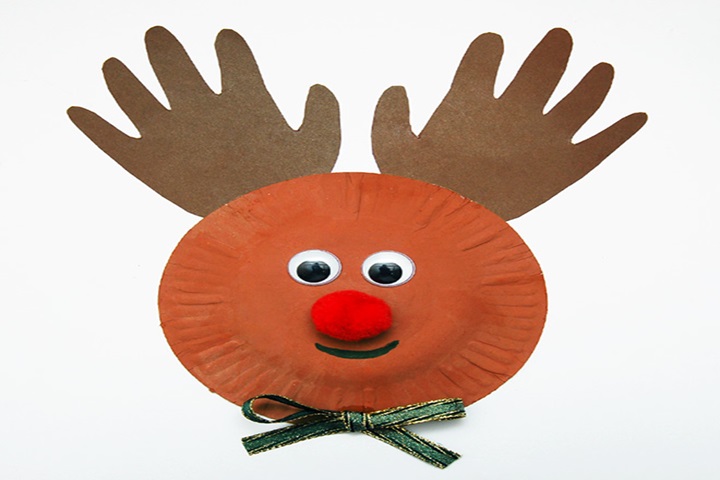
Engaging children in DIY projects for kids can be a great way to keep them entertained while also encouraging their creativity. One such project perfect for the holiday season or when teaching about animals is the Paper Plate Reindeer.
Required Supplies and Materials
● Paper plates
● Brown paint
● Paintbrush
● Construction paper (brown, tan, and red)
● Googly eyes
● Glue
● Scissors
Step-by-step Instructions to Create the Paper Plate Reindeer
1. Start by painting the backside of your paper plate brown. Allow it to dry completely.
2. While your paint is drying, cut out a pair of antlers and ears from the brown construction paper. You’ll also need a smaller pair of inner ears from the tan paper and a round nose from the red.
3. Once your painted paper plate is dry, glue on the pair of eyes, antlers, ears, and nose to bring your reindeer to life.
Tips for Customization and Variations
This project provides ample opportunity for kids to add their unique touch. They could embellish their creation with glitter or stickers. Alternatively, they might prefer to use different colors or patterns when decorating their reindeer’s antlers.
Engaging kids in such activities not only keeps them busy but also helps develop their fine motor skills and stokes their imagination. It’s a fantastic way to spend quality time with them at home or even in an affordable daycare setting like Beibeiamigos, which offers reasonable daycare tuition rates in Phoenix. The result? A delightful piece of artwork that can brighten any room or be used as a festive decoration.
Next up on our list of DIY projects for kids are adorable penguin pillows that are sure to win hearts.
3. DIY Penguin Pillows
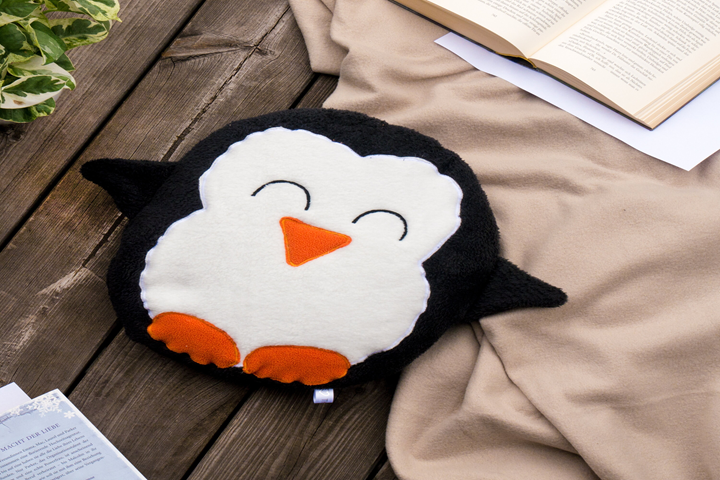
Engaging your child in creative activities such as DIY projects for kids is not just fun; it fosters imagination and can be a bonding experience. Crafting together gives you a chance to teach new skills and create lasting memories. One delightful project to try out is making DIY Penguin Pillows, which combines art with the comforting aspect of a soft toy.
Required Supplies and Materials:
● Black, white, and orange felt
● Fabric glue
● Scissors
● Cotton stuffing or pillow filling
● Sewing kit (optional)
Step-by-step Instructions to Create the DIY Penguin Pillows:
1. Cut two large oval shapes from the black felt for the body.
2. From the white felt, cut out a smaller oval for the penguin’s belly and two circles for the eyes.
3. Use the orange felt for the feet and beak; you’ll need a small triangle for the beak and two feet shapes.
4. Glue or sew the white belly onto one of the black ovals.
5. Attach the beak, eyes, and feet.
6. Align both black ovals together, with all features facing outward, and either sew around the edges leaving a gap at the top or use fabric glue to bond them together.
7. Once dried or stitched shut except for a small opening, stuff your pillow with cotton stuffing.
8. Close up the remaining gap securely.
Tips for Customization and Variations:
● Experiment with different sizes to create a family of penguin pillows.
● Add accessories like bows or scarves using various craft supplies for kids to personalize each penguin.
● Integrate texture by using fabrics like fleece or velour for an extra sensory element.
Crafting can be more than just creating objects; it’s about immersive learning experiences. Consider exploring different languages through craft instructions or names for these adorable penguins by enrolling in Beibei Amigos. Their interactive language learning platform offers a unique approach to bilingual crafting activities. For more inspiration, their blog might offer some fresh ideas.
The joy of this project lies in its simplicity and adaptability — perfect for young hands and minds eager to create!
4. Footprint Butterflies
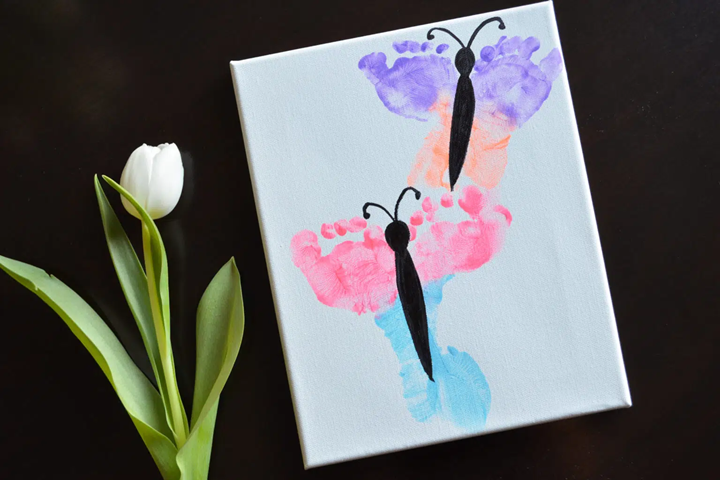
Engaging your children in DIY projects for kids can be a wonderful way to spark their imagination and create lasting memories. One delightful project is creating Footprint Butterflies, which not only capture the whimsy of these elegant insects but also preserve the tiny size of your child’s footprint for posterity.
Supplies and Materials:
● Non-toxic paint
● Paper or canvas
● A paintbrush or sponge
● Baby wipes (for easy cleanup)
● Markers or embellishments for decoration
Step-by-Step Instructions:
1. Begin by selecting a variety of paint colors. These will be used to create the colorful wings of your butterfly.
2. Help your child step into the paint with their barefoot, ensuring an even coating.
3. Carefully press your child’s painted foot onto the paper or canvas to create one wing of the butterfly. Use baby wipes to clean their foot.
4. Repeat the process with the other foot, angling it to mirror the first print and form the second wing.
5. Once dry, use markers to draw the body, antennae, and any additional details on your butterfly.
6. Add glitter, stickers, or other craft supplies for kids to embellish and personalize your Footprint Butterfly.
Customization Tips:
● Experiment with different colors and patterns on each wing for a vibrant effect.
● For a unique twist, turn this activity into an educational moment by incorporating elements from various butterfly species.
● You could also use this project to teach children about symmetry in nature.
Crafting with children not only fosters creativity but can also be a learning experience. When engaging in creative activities with children, considering immersion programs like those offered at Beibeiamigos, a leading preschool in Phoenix with immersive language and art programs, can enrich their developmental journey.
With just a few simple steps and some basic supplies, you’ll have created something that’s both an art piece and a keepsake—a perfect representation of how DIY projects for kids can lead to treasured outcomes.
5. Poured Paint Pots
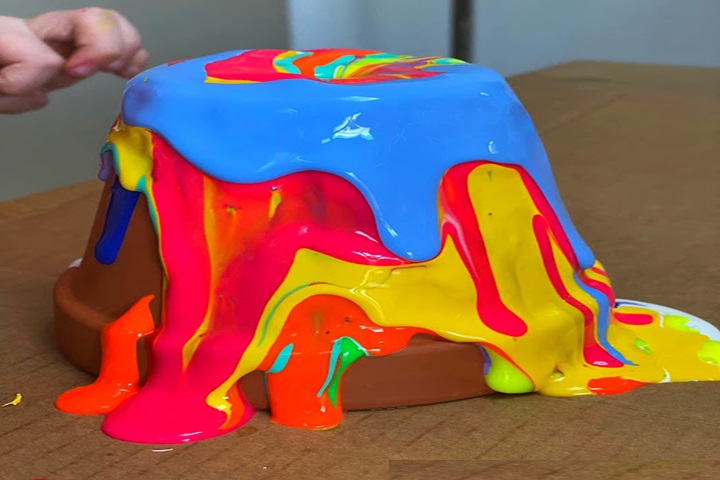
Engaging in DIY projects for kids not only fosters creativity but also develops fine motor skills. One such project that combines art and fun is creating Poured Paint Pots. This activity allows children to play with colors and patterns, resulting in unique and vibrant pots that can be used for plants or as decorative pieces.
Supplies and Materials
To begin this project, you will need:
● Terracotta pots or any other material suitable for painting
● Acrylic paints in various colors
● Disposable cups for mixing paint
● Stir sticks or spoons
● A drop cloth or newspapers to protect your work surface
● Clear sealant (optional)
Step-by-Step Instructions
1. Prepare your workspace by laying down a drop cloth or newspaper.
2. Place a pot upside down on the work surface.
3. In disposable cups, mix acrylic paint with a small amount of water to get a pourable consistency; stir well.
4. Pour one color at a time over the pot, allowing it to drizzle down the sides.
5. Rotate the pot to let the paint flow and cover different areas.
6. Add additional colors, pouring them over the pot in layers or patterns as desired.
7. Let the pot dry completely after you are satisfied with the design.
8. If desired, apply a clear sealant to protect the paint from weather elements.
Customization and Variations
Customize your Poured Paint Pots by:
● Mixing paints to create new shades before pouring.
● Using metallic paints for a shimmering effect.
● Applying glow-in-the-dark paint for an exciting nighttime display.
● Arranging multiple pots in a group to form a cohesive color story.
These artistic pots make fantastic gifts and can brighten up any corner of your home or garden. Encourage your child’s imagination to run wild with this colorful craft supply for kids, where the possibilities are endless.
If you’re looking for more creative activities and educational programs for your child, consider Beibei Amigos, a premier Spanish immersion school in Phoenix. They offer tailored education for kids to thrive globally through their top-notch Spanish immersion programs. Enroll now and let your child explore the world of language and culture in an immersive and engaging way!
More Fun DIY Projects for Kids
While the projects mentioned offer a wealth of fun and creativity, it’s important to know that there are many more DIY ideas for kids out there. Here are some additional suggestions:
1. Explore Different Craft Supplies
Children can dive deeper into their creative pursuits by exploring a variety of craft supplies. Think beyond scissors and glue – consider incorporating materials like yarn, felt, sequins, or even recyclable items like cardboard tubes and plastic bottles. These supplies not only open up a new realm of creative possibilities but also teach kids about resourcefulness and sustainability.
2. Try Out Exciting Painting Techniques
When it comes to painting, there’s so much more than just brushing colors on paper. Introduce your little ones to different painting techniques that are suitable for children’s art projects. From stamping with sponges and potato halves to creating marble effects with shaving cream, these techniques bring an extra layer of excitement to any art project while enhancing their fine motor skills.
3. Engage in Imaginative Activities
Let’s not forget about activities that engage their imagination. Creating storybooks from scratch, designing a spaceship from cardboard boxes, or making a mini city with paper mache – the list is endless. These creative activities don’t just result in tangible creations; they nurture your child’s storytelling skills, problem-solving abilities, and spatial intelligence.
Remember the goal here isn’t perfection; it’s about enjoying the process and fostering a love for creativity in your child. So go ahead, let them experiment with different materials and techniques – who knows what masterpiece they might create next!
Conclusion
Dive into the world of art and creativity with your child by exploring these easy DIY projects for kids. Each project promises a fun-filled experience while imparting valuable skills to your little one. From tissue box monsters to paper plate reindeer, there’s a new adventure at every turn.
Remember, it’s not about creating perfect pieces but rather about nurturing creativity and making memories together. So, don’t shy away from trying different children’s art and craft ideas. It’s time to roll up your sleeves and get messy with paints, glitters, and all things crafty!
Your child’s imagination is a treasure trove waiting to be discovered. Are you ready to embark on this beautiful journey?

